Today, I thought I would show you an easy way of how you can make your own blog button like mine above.
Blog buttons are a great way of getting your blog ‘out there’. By putting a blog button with a grab box on your sidebar, its easy for anyone who likes your blog to put your button on their site or in the case of button swaps it just makes it so much easier!
1. Firstly you need to make a blog button. This can be your blog header resized or you can make one from scratch. If your making one I recommend using picmonkey which is free and easy to use!
I would say a decent sized blog button is around 200px x 150px or anything similar (it really depends on what looks best for your button and blog sidebar.
2. Once you have a button, you need to upload it to a site such as photobucket.
3. Going back to your blog, you need to add the following code into the add html gadget via the layout section of blogger (see below).
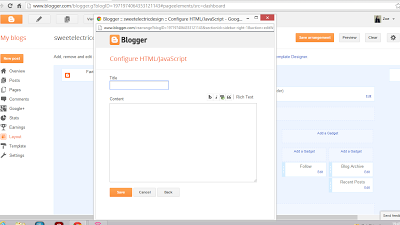
4. Add the following code into the html box – Edit: Now updated as the previous coding stopped working!
5. In the pink section you need to delete the text and type the link for your blog homepage, for example mine is http://www.sweetelecricblog.com
In the yellow section delete blog name and type in the name of your blog
In the green section you need to delete the text and type in the link to your blog button – if you’re using photobucket you need to copy and past the direct link code.
6. Click save and voila!Your blog button and grab box will now be visible on your blog!
*The code will also centre your button in your blog sidebar*