Photo editing is an important part of content creation. Unfortunately, I don’t have a large amount of free time available to take photos or edit and I would rather spend more time writing and planning. For those of you in a similar position, here’s a guide on how to take/edit your photographs.
Taking photos.
To save time, its best to take your photos in bulk. I have a planner so I know what posts I’m writing for the week ahead and then I can take my photographs based on that. I usually take hundreds of photos in one go as you never know how they’re going to turn out. Sometimes a photo can look great on your camera screen but be slightly blurry when its been uploaded. I like to play around with backgrounds to so I’ll change things up as I go along. Once you start taking photos, its very easy to accumulate hundreds, so its handy to have a large(ish) memory card to store them on. Once they’re uploaded, I’ll have a quick look through them and select the best ones.
Regular photo editing.
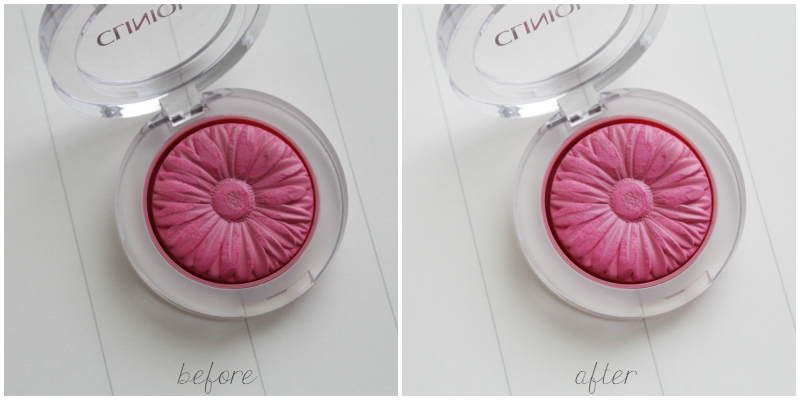
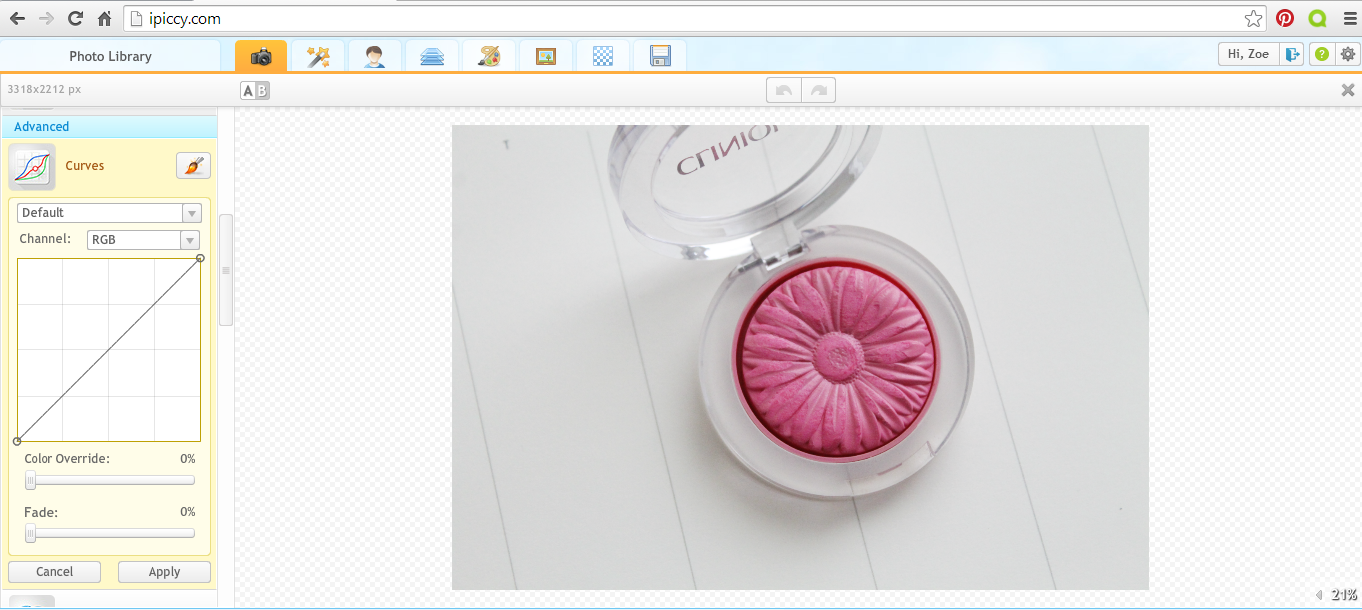
For regular beauty posts, I try to keep editing to a minimum. I take all my photos in natural light – I usually take them in my bedroom, where theres quite a lot of light. The only thing I usually change apart from cropping is the brightness of a photograph and I do this using the curves option on ipiccy.
This is pretty much all I do in ipiccy as I don’t like over editing photographs. However for photos, such as collages and for using text over a photo, I use a different method.
Collages and text.
For collages and text, I normally use picmonkey (another free editing site). I use picmonkey as you can now use your own overlays and fonts. To use your an overlay in picmonkey, you upload a photograph as normal and then click onto the overlay section;
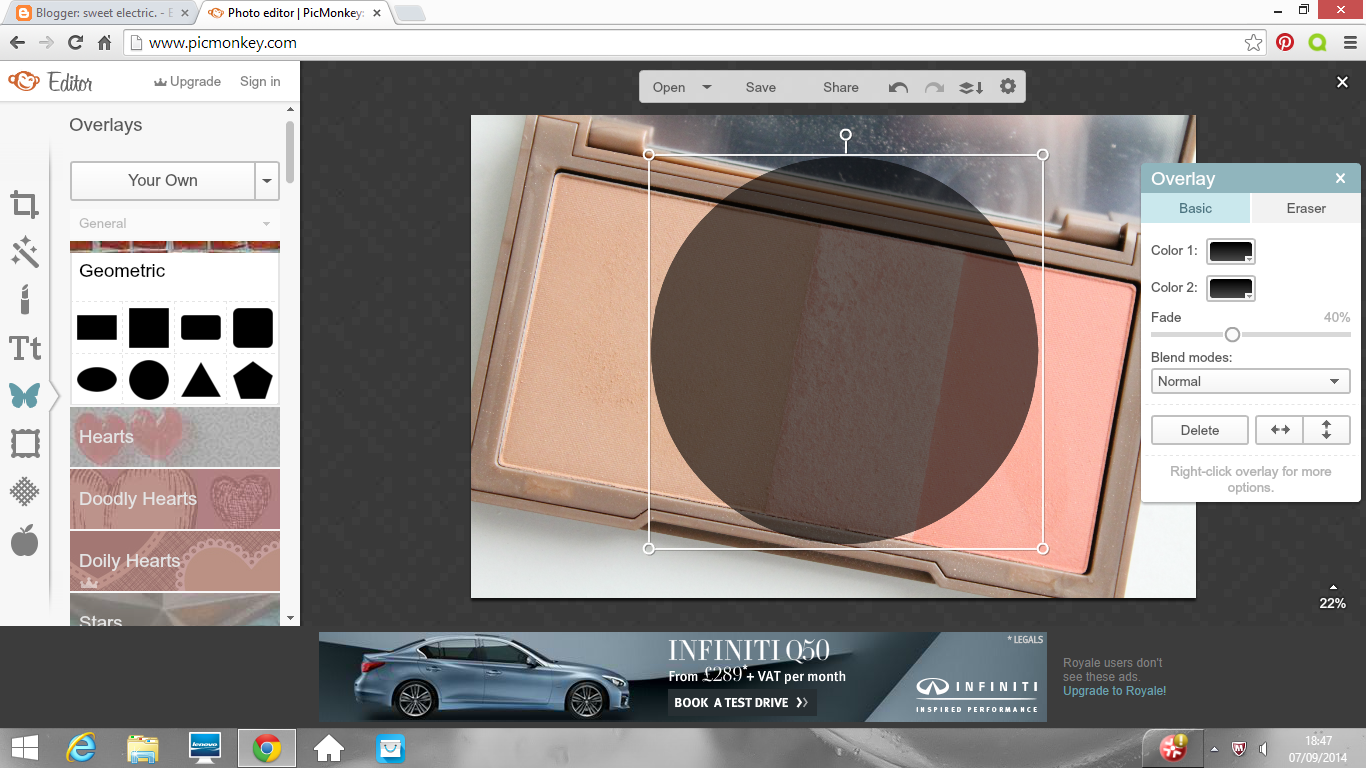
I normally use a circle or square and then fade out (on the right hand side selection) to about 40%, so you can still see the original photo through the overlay. I’ll then add some text using the text section;
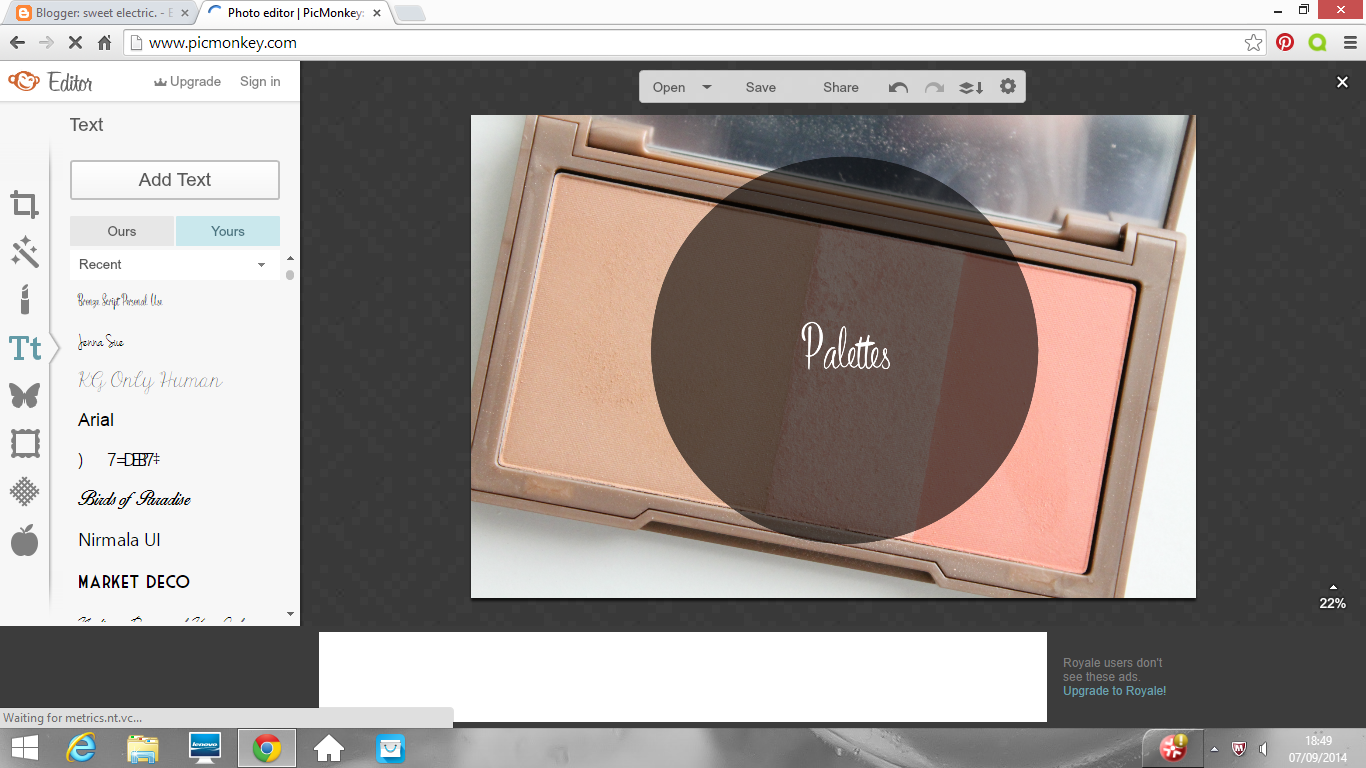
Picmonkey have several free fonts you can choose from but you can also now use the fonts stored on your computer, which means you can download lots of free fonts from the net to use on your pictures. I really like fontquirrel and dafont for free fonts!
For collages, such as wishlists I use the design option on the front page of picmonkey to get a blank canvas. From here, you can then use the overlay option to select your own overlays – photos for your wishlists etc. These usually need resizing and then you can add text.
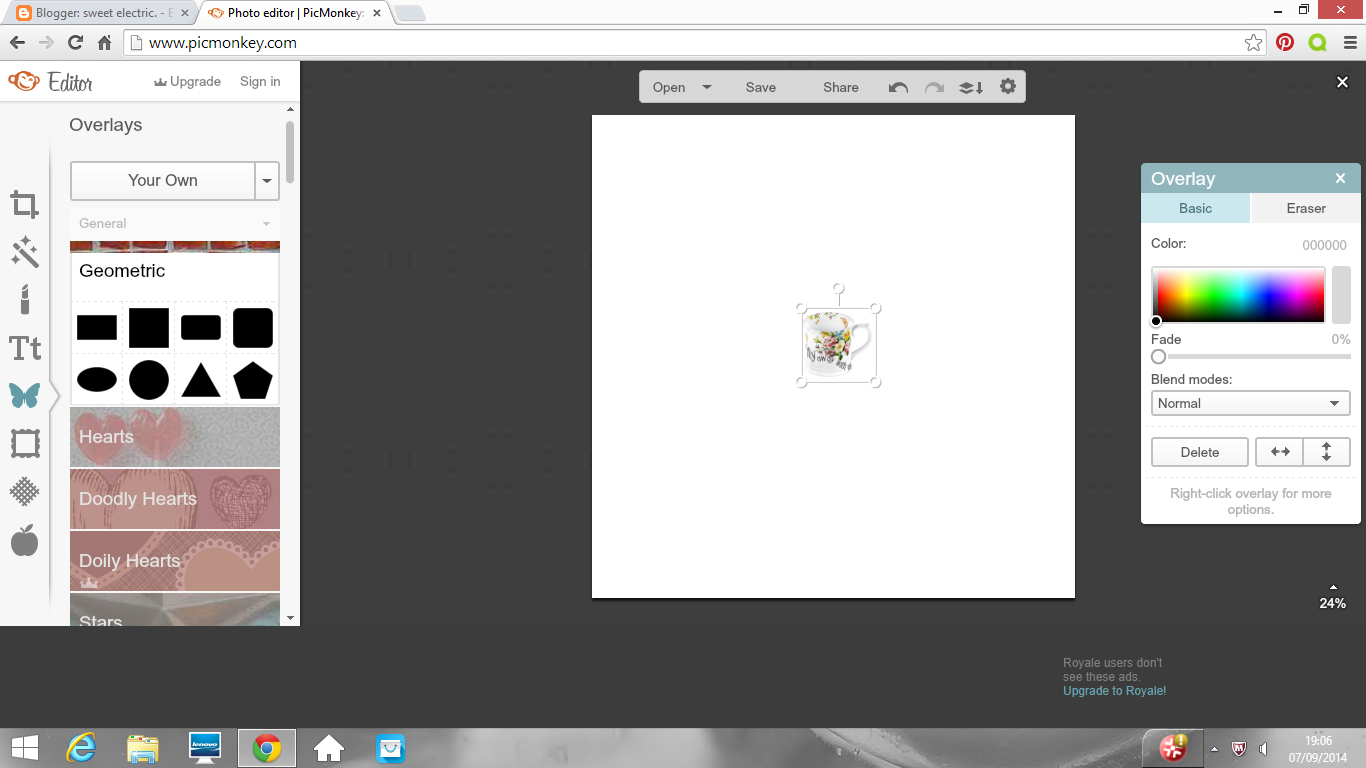
Photo collages.
You can also make collages via the collage option on the picmonkey homepage – this is great for putting one or more product photo in an image, such as the one of the Clinique blusher above. Collages can also be made on ipiccy and fotor – these have different template options. You can then also add text afterwards via the usual method once you’ve finished your collage.
Every blogger has different ways of editing their photos and this is just a quick way that works for me. What photo editing sites/programmes do you use?