HOW TO USE PINTEREST TO BOOST YOUR BLOG

Though Pinterest is a great way to procrastinate, its also great for helping to promote your blog and posts. I’m bar far a Pinterest expert but I do use it for my blog and I’m starting to see a bit of traffic from there. This post is a brief guide with links to other information that’s really helpful in getting the most out of it.

What is Pinterest?
If you dont know what Pinterest is, its basically a platform where you can pin images you like to boards. If you sign up to pinterest, I think its a good idea to have a button/social media icon or widget (like I have further down the page) so your subscribers can easily follow you on there. I also think its useful to have a business account – you can sign up here. Its pretty much the same as a standard account but you get to see your analytics so you can view which of your pins are popular which in turn can help you to boost your pinterest subscribers.

How do I pin images from my blog?
I use a pinterest widget for chrome toolbar which allows you to easily pin images from websites onto your boards (you can find that here). You can also add a pin it button to your images so your blog readers can easily pin your blog photos to their boards – this post explains how to add a pin it button to your images. You can also add a share button underneath your posts like I currently have so its even easier for readers to pin your posts/images – you’ll find how to do that here.

How do I gain subscribers on Pinterest?
I think the best way to gain followers on Pinterest is by making sure that you have a widget or follow button on your blog, regularly pin images from other pinners onto your boards and follow other pinners or their boards. As I said at the start of this post, I’m no expert on Pinterest and I dont have thousands of subscribers on there so I’ve started reading advice from others on how to make the most of my pinterest account. This post offers some good insight into growing your pinterest profile as does this infographic.
 
What are rich pins?
Rich pins include extra information about the image source. If you want to enable rich pins for blogger (note to self – you need to do this!) then this is a brilliant post by XOMISSE.com

What else do I need to know?
Some great resources to read are:

*43 ways to grow your blog with pinterest
*How to make your pins go viral
*How to create images people love to pin
*How to go viral on pinterest
*How to SEO your pinterest page
*Use pinterest to boost blog traffic
*How to convert pinterest visitors to subscribers
*7 must have pinterest marketing tools

Do you have a Pinterest account – leave your link below if so!
Do you have any Pinterest tips to share?

108 BLOG POST IDEAS | FOR WHEN WRITERS BLOCK STRIKES

Creating ideas for your blog can be a challenge if you’re suffering from writers block. To give you some inspiration, here are 108 blog post ideas to help kick start your creative juices. These can serve as pointers, blog titles or even as an idea for a blog series and are suitable to use for most blogs. You can switch them up and add your own spin. I hope they’re helpful.

Blog Post Ideas
product review
brand focus
what’s in my makeup bag
what’s in my bag
outfit of the day
beauty product dupes
recipe post
wishlist
great budget beauty buys
products worth the splurge
most used products
favourite makeup brushes
facts about me
what I did during the weekend
my favourite books
book review
my favourite blog posts from the past month – sharing the blogger love
5 places I’d like to travel to
a roundup of new upcoming beauty products
letter to my teenage self or letter to my future self
DIY project
makeup tutorial
skincare routine
everyday makeup
room tour
favourite songs
Why I started blogging
blogging inspiration
my blogging routine
my hopes and aspirations
blog photo setup
my favourite hair styles
what’s on my phone
five things that make me happy
5 quotes I love
a haul post
favourite places to visit in my city
5 healthy eating ideas
empty products
things I want to achieve this year
shop my stash
nail art
my favourite nail polishes
my desk/makeup desk staples
my fitness routine
my favourite beauty brands
my favourite clothing brands
what I’ve been up to lately
how to accessorise an outfit
my favourite instagram accounts
10 favourite pins on pinterest
tips to save money
a holiday post
celebrity fashion/beauty inspiration
home details – favourite home accessories
how to organise your beauty products
how to organise your wardrobe
date night ideas
my favourite apps
5 TV shows I love to watch
sale buys worth purchasing
a photography post
ways to beat blemishes
In my friends makeup bag
guest blog post
things I wish I knew when I started blogging
things I’ve learnt from uni/college
5 minute makeup
brow routine
contouring post
how to style a pair of jeans
how to style a black dress
a day in my life
cute t-shirt ideas
overhyped beauty products
building a makeup collection
three of my favourite purchases
a tag post
my wardrobe staples
things I’m looking forward to in Summer
blog sale
5 easy ways to style your hair
favourite MAC products
how to apply winged liner
tips to organise your blog
the best scented makeup products
my shoe wardrobe
how to use a planner
how to apply fake tan
5 minute manicure
everyday fragrances
films to see this month
beauty gadgets worth purchasing
how much is my face worth?
healthy snack ideas
project life scrapbook
how to cope with a hangover
easy beauty tips tricks
my favourite photographs
exam revision tips
favourite music festivals
5 reasons to love yourself – a confidence post
what I remember from the 90’s – my childhood
what I learned in my teens
how to workout at home
refreshing your room on a budget
5 breakfast ideas
gift ideas for your loved ones…

Giveaway! Win 20 Makeup Revolution Lip Hug Lipsticks

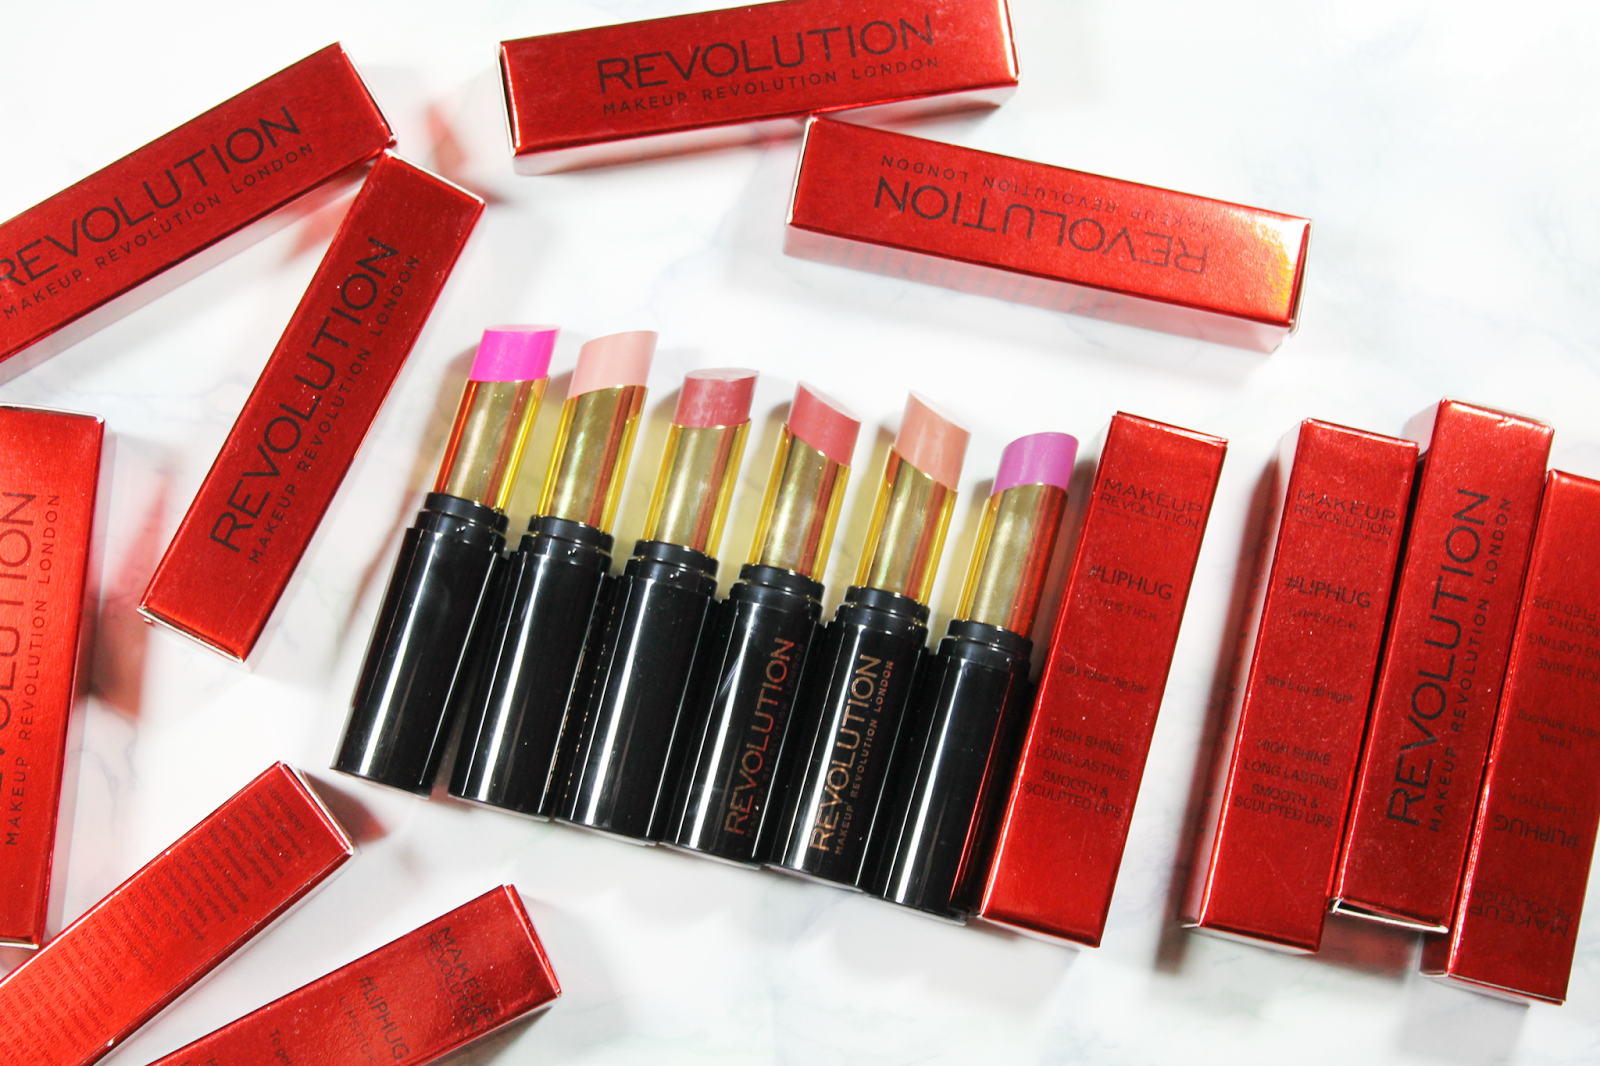
Today I have an awesome giveaway to share with you. The lovely people at Makeup Revolution have kindly offered one reader the chance to win a full set of 20 makeuprevolutionstore.com/index.php/lips/new-liphug.html.

These are a recent launch and not only offer pigmented colour but they’re really easy to wear too.

To enter this competition simply enter your details in the rafflecopter form below. This giveaway is open worldwide and ends on December 31st.…

A PHOTO EDITING PROCESS FOR BUSY GIRLS

Photo editing is an important part of content creation. Unfortunately, I don’t have a large amount of free time available to take photos or edit and I would rather spend more time writing and planning. For those of you in a similar position, here’s a guide on how to take/edit your photographs.

Taking photos.
To save time, its best to take your photos in bulk. I have a planner so I know what posts I’m writing for the week ahead and then I can take my photographs based on that. I usually take hundreds of photos in one go as you never know how they’re going to turn out. Sometimes a photo can look great on your camera screen but be slightly blurry when its been uploaded. I like to play around with backgrounds to so I’ll change things up as I go along. Once you start taking photos, its very easy to accumulate hundreds, so its handy to have a large(ish) memory card to store them on. Once they’re uploaded, I’ll have a quick look through them and select the best ones.

Regular photo editing.
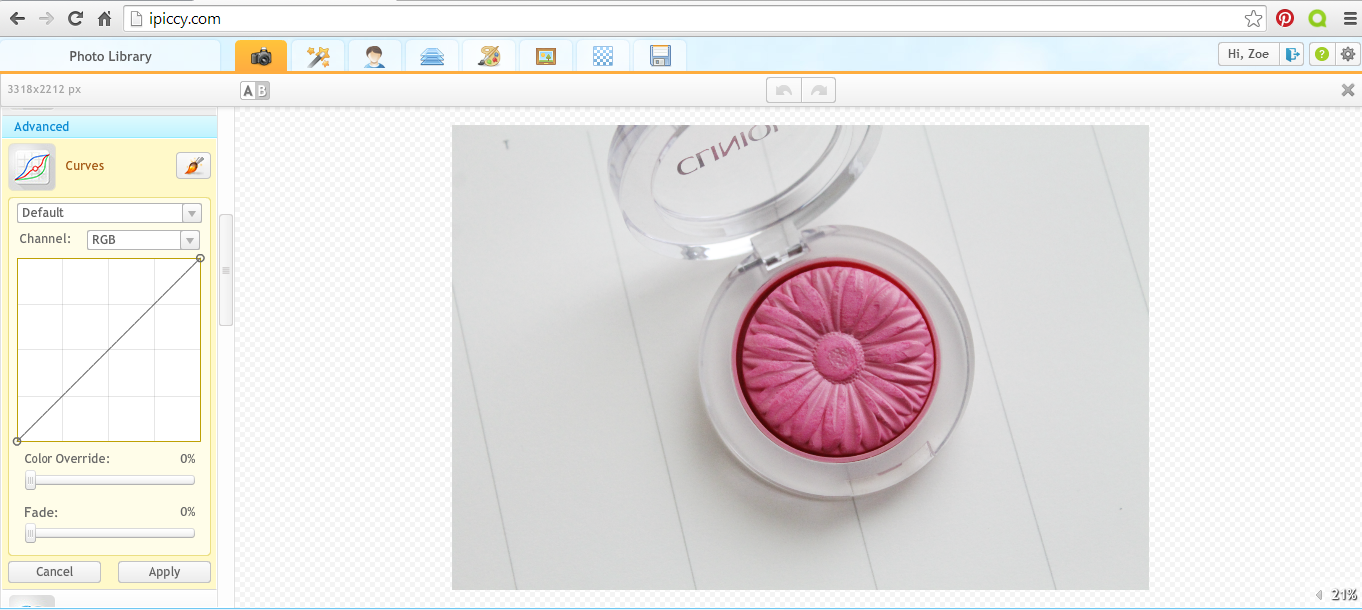
For regular beauty posts, I try to keep editing to a minimum. I take all my photos in natural light – I usually take them in my bedroom, where theres quite a lot of light. The only thing I usually change apart from cropping is the brightness of a photograph and I do this using the curves option on ipiccy.


This is pretty much all I do in ipiccy as I don’t like over editing photographs. However for photos, such as collages and for using text over a photo, I use a different method.

Collages and text.
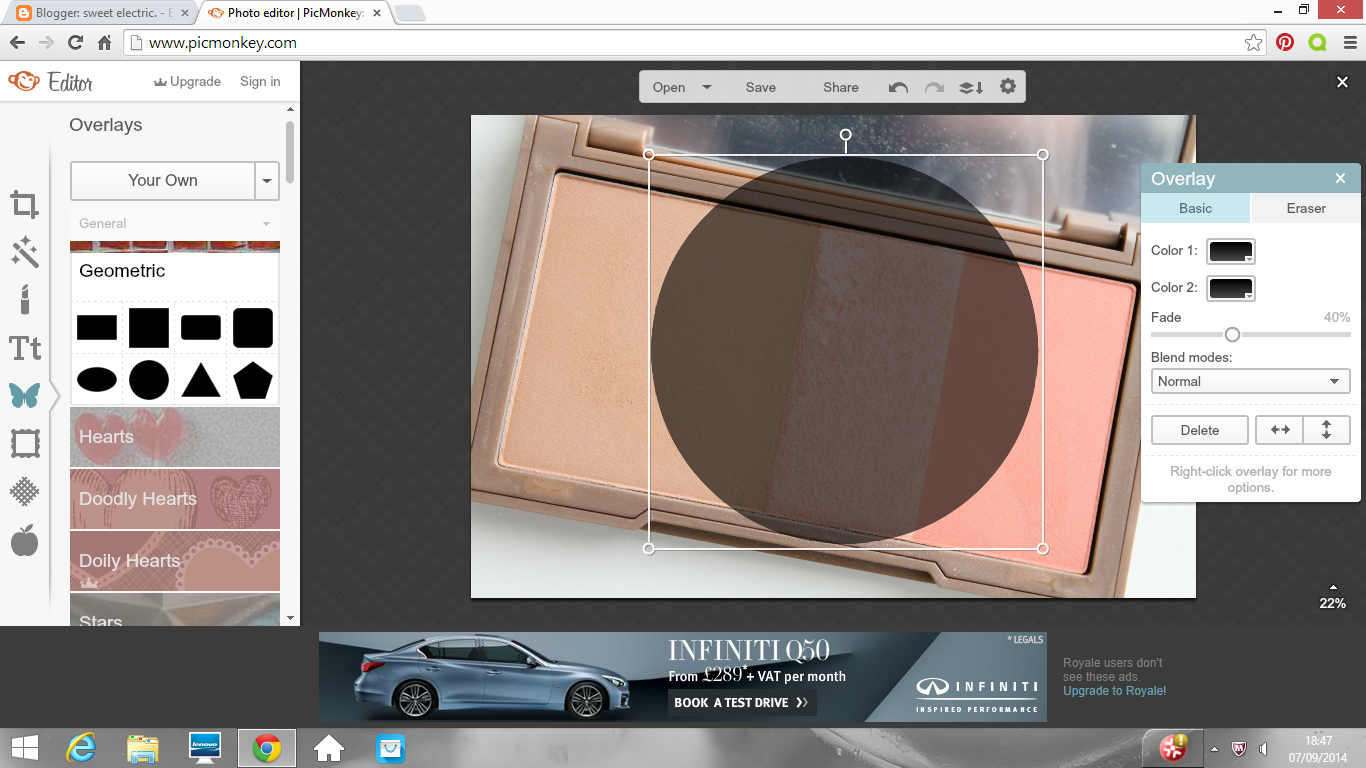
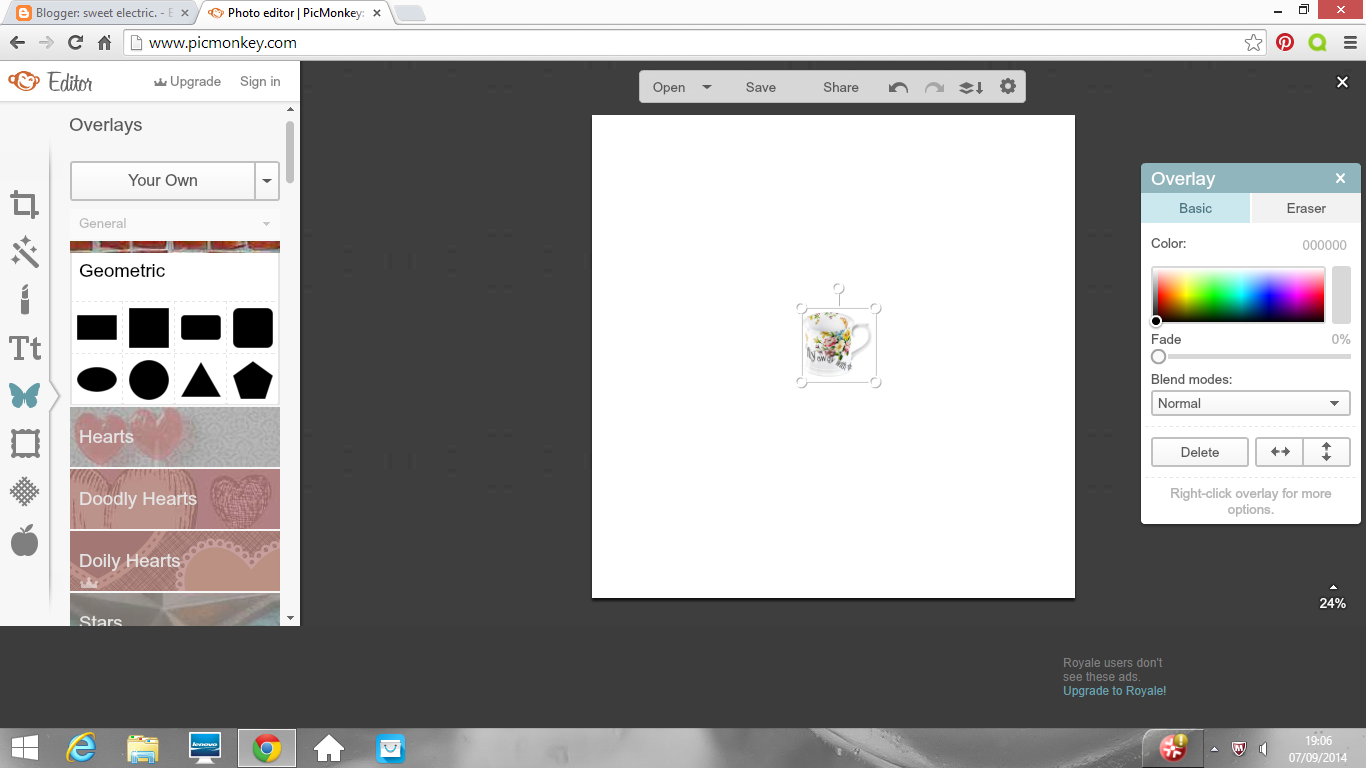
For collages and text, I normally use picmonkey (another free editing site). I use picmonkey as you can now use your own overlays and fonts. To use your an overlay in picmonkey, you upload a photograph as normal and then click onto the overlay section;

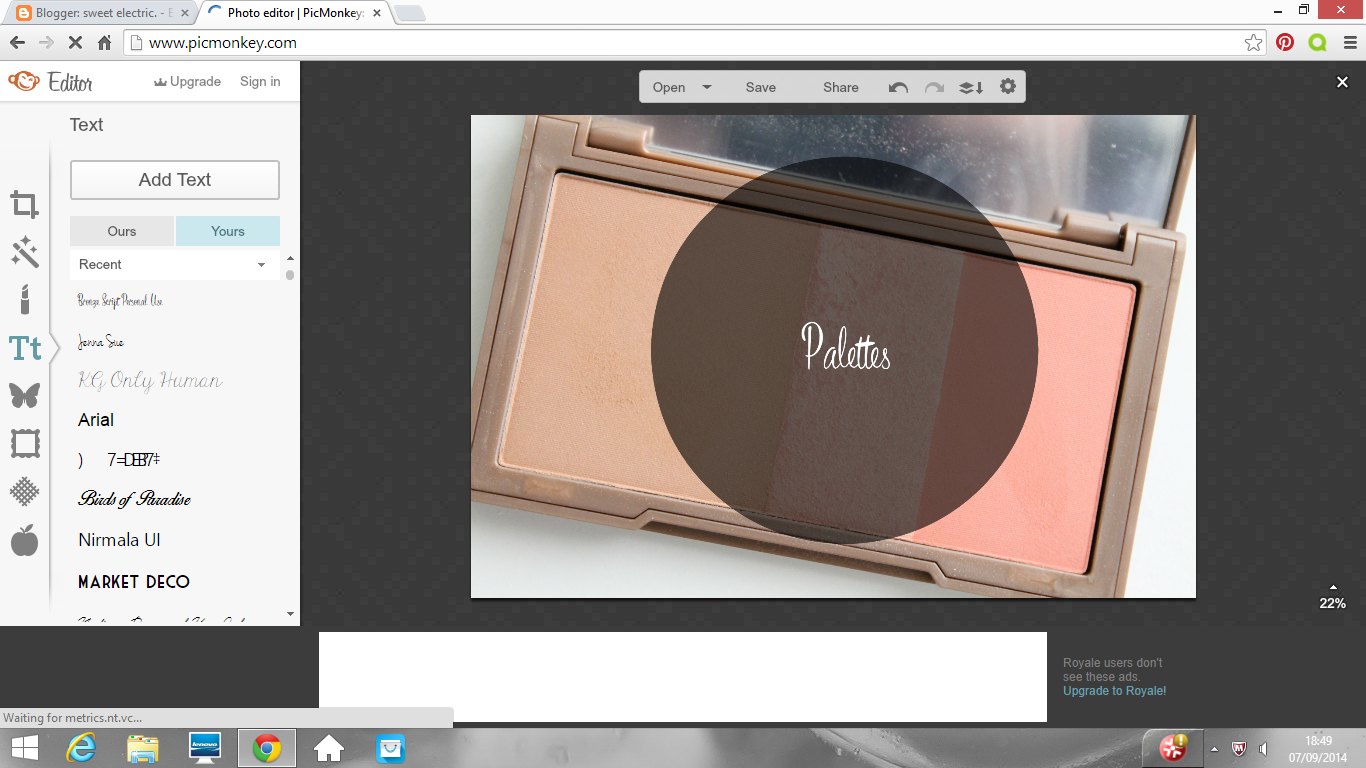
I normally use a circle or square and then fade out (on the right hand side selection) to about 40%, so you can still see the original photo through the overlay. I’ll then add some text using the text section;

Picmonkey have several free fonts you can choose from but you can also now use the fonts stored on your computer, which means you can download lots of free fonts from the net to use on your pictures. I really like fontquirrel and dafont for free fonts!
For collages, such as wishlists I use the design option on the front page of picmonkey to get a blank canvas. From here, you can then use the overlay option to select your own overlays – photos for your wishlists etc. These usually need resizing and then you can add text.

Photo collages.
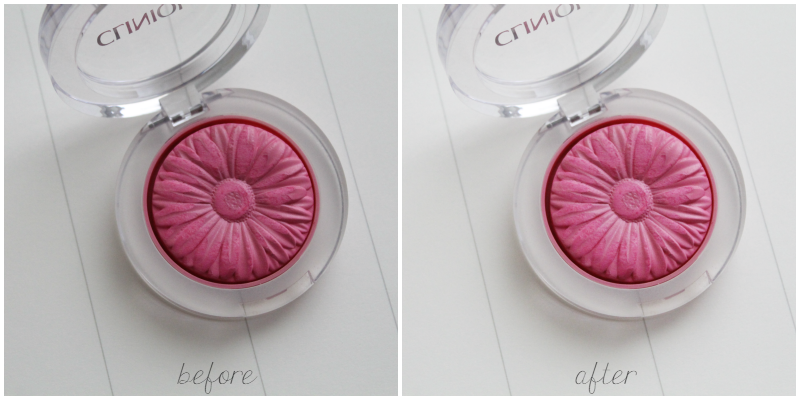
You can also make collages via the collage option on the picmonkey homepage – this is great for putting one or more product photo in an image, such as the one of the Clinique blusher above. Collages can also be made on ipiccy and fotor – these have different template options. You can then also add text afterwards via the usual method once you’ve finished your collage.

Every blogger has different ways of editing their photos and this is just a quick way that works for me. What photo editing sites/programmes do you use?

MAC Alluring Aquatic Haul & Swatches

MAC’s summer collections are always a firm favourite. Being in the UK is extra lucky as the summer collection is released here first.
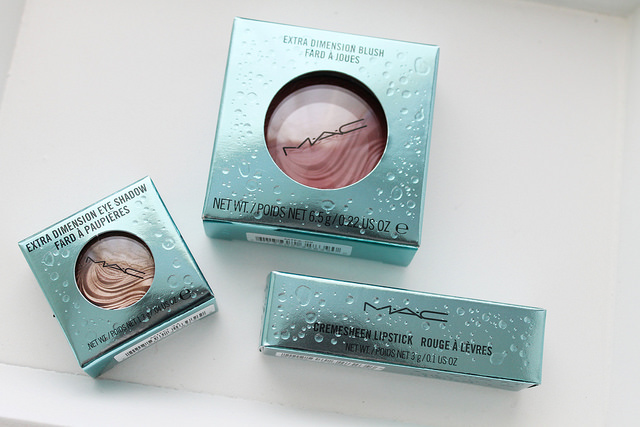
I didn’t expect this collection to be released for another week or two but I spotted online on Thursday and my order arrived this morning. I must admit, it arrived super fast – I used standard delivery as I missed the next day cutoff and it still arrived today. This time around I purchased three products. Having to make a wish list without seeing swatches first is tough so I just went from the colour story and descriptions on the MAC website.
MAC_Alluring_Aquatics_Collection
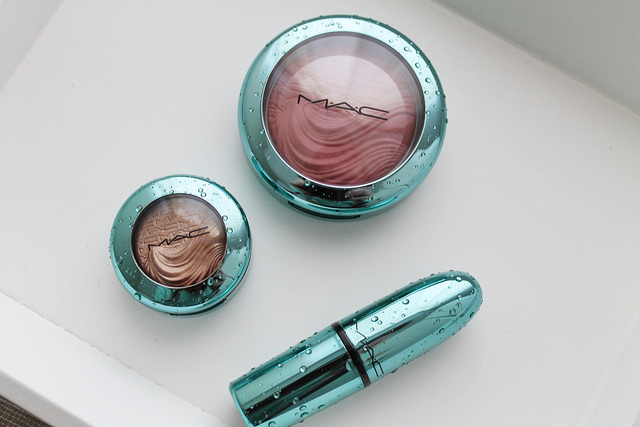
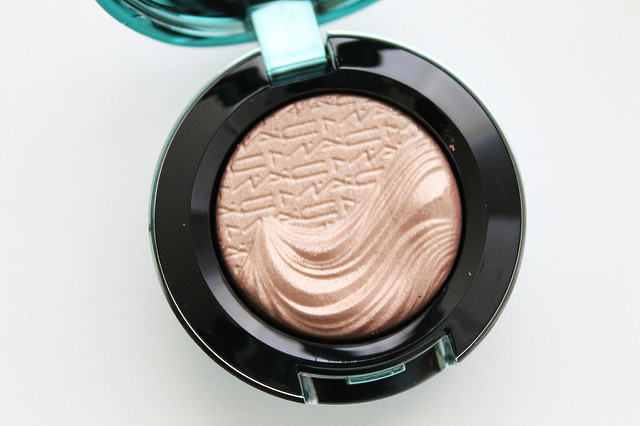
The packaging is so beautiful. Even the outer boxes have the water splash on. On the product packaging are 3d water splashes which fit in with the aquatic theme. I chose the sea me hear me blush, mystical lipstick and eyeshadow in lorelei.
MAC_sea_me_hear_me_blush

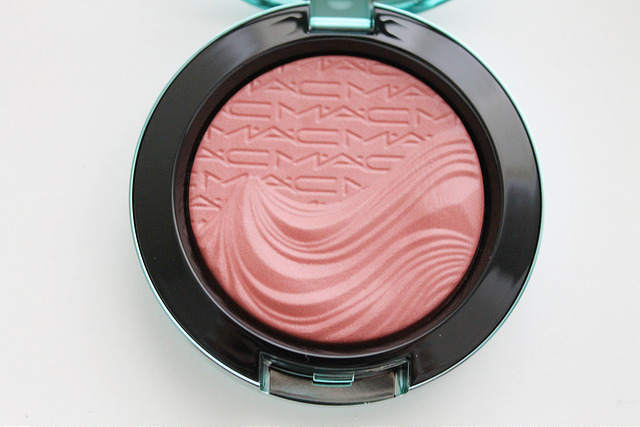
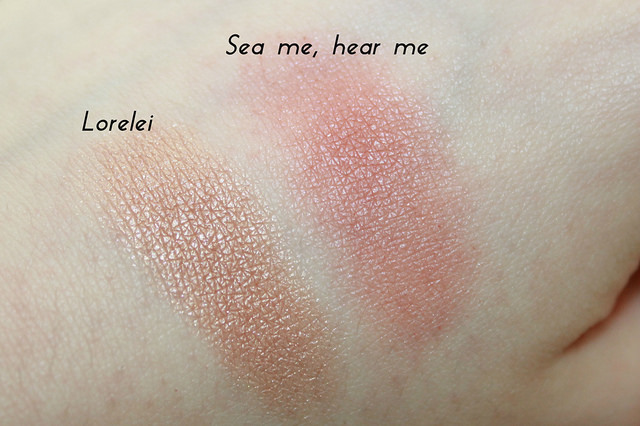
Sea me, hear me is an extra dimension blush in beige pink. I would describe it as a rose pink with beige undertones. The extra dimension formula blush is described by MAC as a liquid/powder with prismatic reflections. Sea me, hear me feels soft to touch and is pigmented but not overly so. I’m NC15 and though I havent tested the wear yet, on the swatch (below) I had to build up to get the colour you see. I’d imagine this is a buildable product so it wont apply to heavy on lighter skin tones. This blush has a slightly shimmery and metallic finish.

MAC_Lorelei_shadow

Lorelei an extra dimension eyeshadow in a golden beige shade with a metallic finish. The extra dimension shadows in this collection are mini sized and not the larger versions that have previously been released. Being a neutral lover, I think this shade is so beautiful. The pigmentation is incredible, better than the blush. The swatch below is literally a one finger swipe. The texture is also smooth and soft.

MAC_alluring_aquatic_swatch

MAC_mystical_lipstick

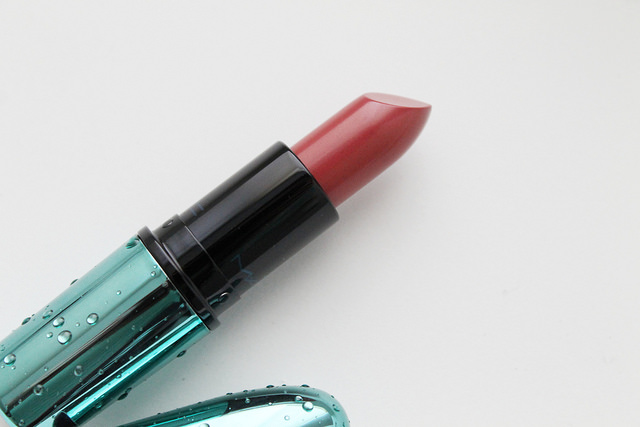
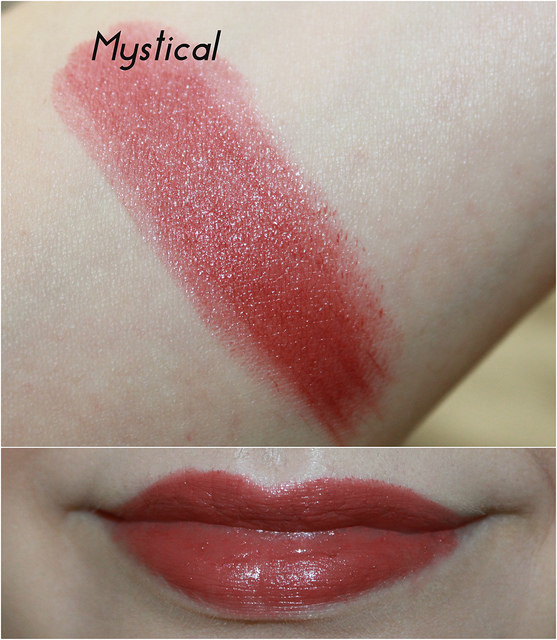
Finally, I ordered a lipstick in mythical – a midtone creamy rose with brown undertones in a cremesheen finish. I generally find MAC lipsticks drying but my lips are naturally on the drier side anyway. The cremesheen finish feels creamy, smooth and comfortable to wear. I usually get around four hours wear with a MAC lipstick.

MAC_mystical_lipstick_swatch

I did find mystical was slightly on the sheerer side – it took several swipes to build the swatch up. However, it is a beautiful shade and goes well with the eyeshadow and blush. Overall, I’m happy with this little haul. All the lipsticks from this collection are currently sold out on the MAC website, as well as sea me, hear me but the collection should be in stores by the end of the week and its also still to go live on the Debenhams website too. Will you/have you picked anything up from this collection?

HOW TO ADD SOCIAL MEDIA ICONS TO BLOG POSTS!

Linking your social media accounts to your blog is not only a good way to boost your subscribers but in turn get your blog posts ‘out there’.
You may already know how to add social media buttons to your blog in which case this will be super easy but first I’ll show you how to add these in case you don’t already know. Firstly, you need to find or create your social media buttons – there are tonnes of free ones on the internet. Once you have some buttons, you need to add them to photobucket or a similar site. Then you need to go to the layout page on blogger – add html and add the following code:

In the yellow area is where you place the link to your social media account. In the blue area is where you put the direct link to your image on photobucket (or alternative to photobucket). In this coding, I’ve adding some padding in order to space out the social media buttons. In orange, you can increase or decrease this number depending on how much spacing you want between your buttons.

Once you have you social media buttons, you can add them to your blog posts. Adding your buttons to your blog posts, just makes it that bit easier for readers to find/follow your accounts. To add your buttons to your posts, all you need to do is copy the above coding (the coding you have for your social media buttons on your blog) and go to settings on your blogger dashboard. Then go to posts and comments section and paste the coding into the post template area. Click save. This ensures that when you go to write a new blog post, the coding and your buttons will automatically show up in your blog post!

If you prefer to use text links rather than buttons like I have in this post then you need to use the coding below;
Twitter | Bloglovin | Google +
In yellow just add the link to your chose social media account and in purple is the name of the account – you can change these to whichever one you want to use. Again, if you want to use this code, just paste it into the post template area in the posts and comments section in your settings on blogger dashboard. I hope this was helpful.

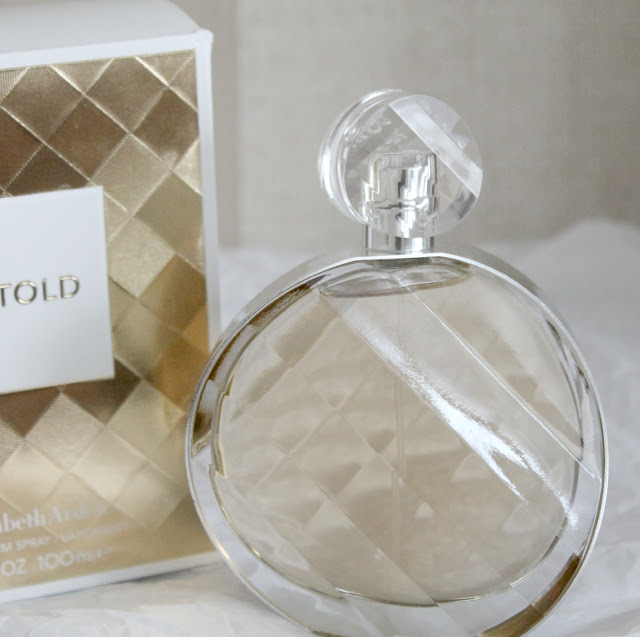
a new fragrance: elizabeth arden untold


debenhams.com/beauty/elizabeth-arden

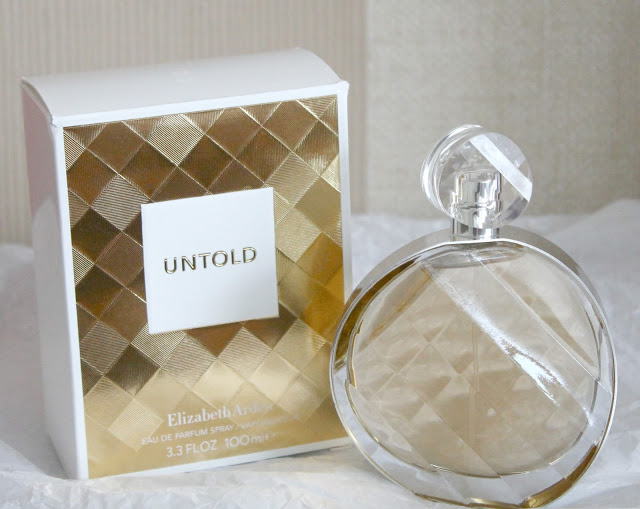
Today, I have Elizabeth Arden’s first signature fragrance to share with you. Untold celebrates the individuality of the modern woman and the untold stories that define and inspire her.

The fragrance is a sophisticated, sensual, feminine scent that captures the different facets that make the modern woman intriguing.
Untold opens with notes of pink pepper, crisp bergamot and fruity accents of pear and blackcurrant to reflect optimism and playfulness. Delicate gardenia petals and Egyptian jasmine reveal romantic femininity, whilst sensuality and mystery is evoked by notes of sandalwood, ambers and musk.

Untold is a soft but sensual fragrance that lingers without overpowering meaning its perfect for daytime wear as well as evening. A floral, fruity scent that whilst isn’t particularly groundbreaking would make a lovely fragrance for autumn/winter.

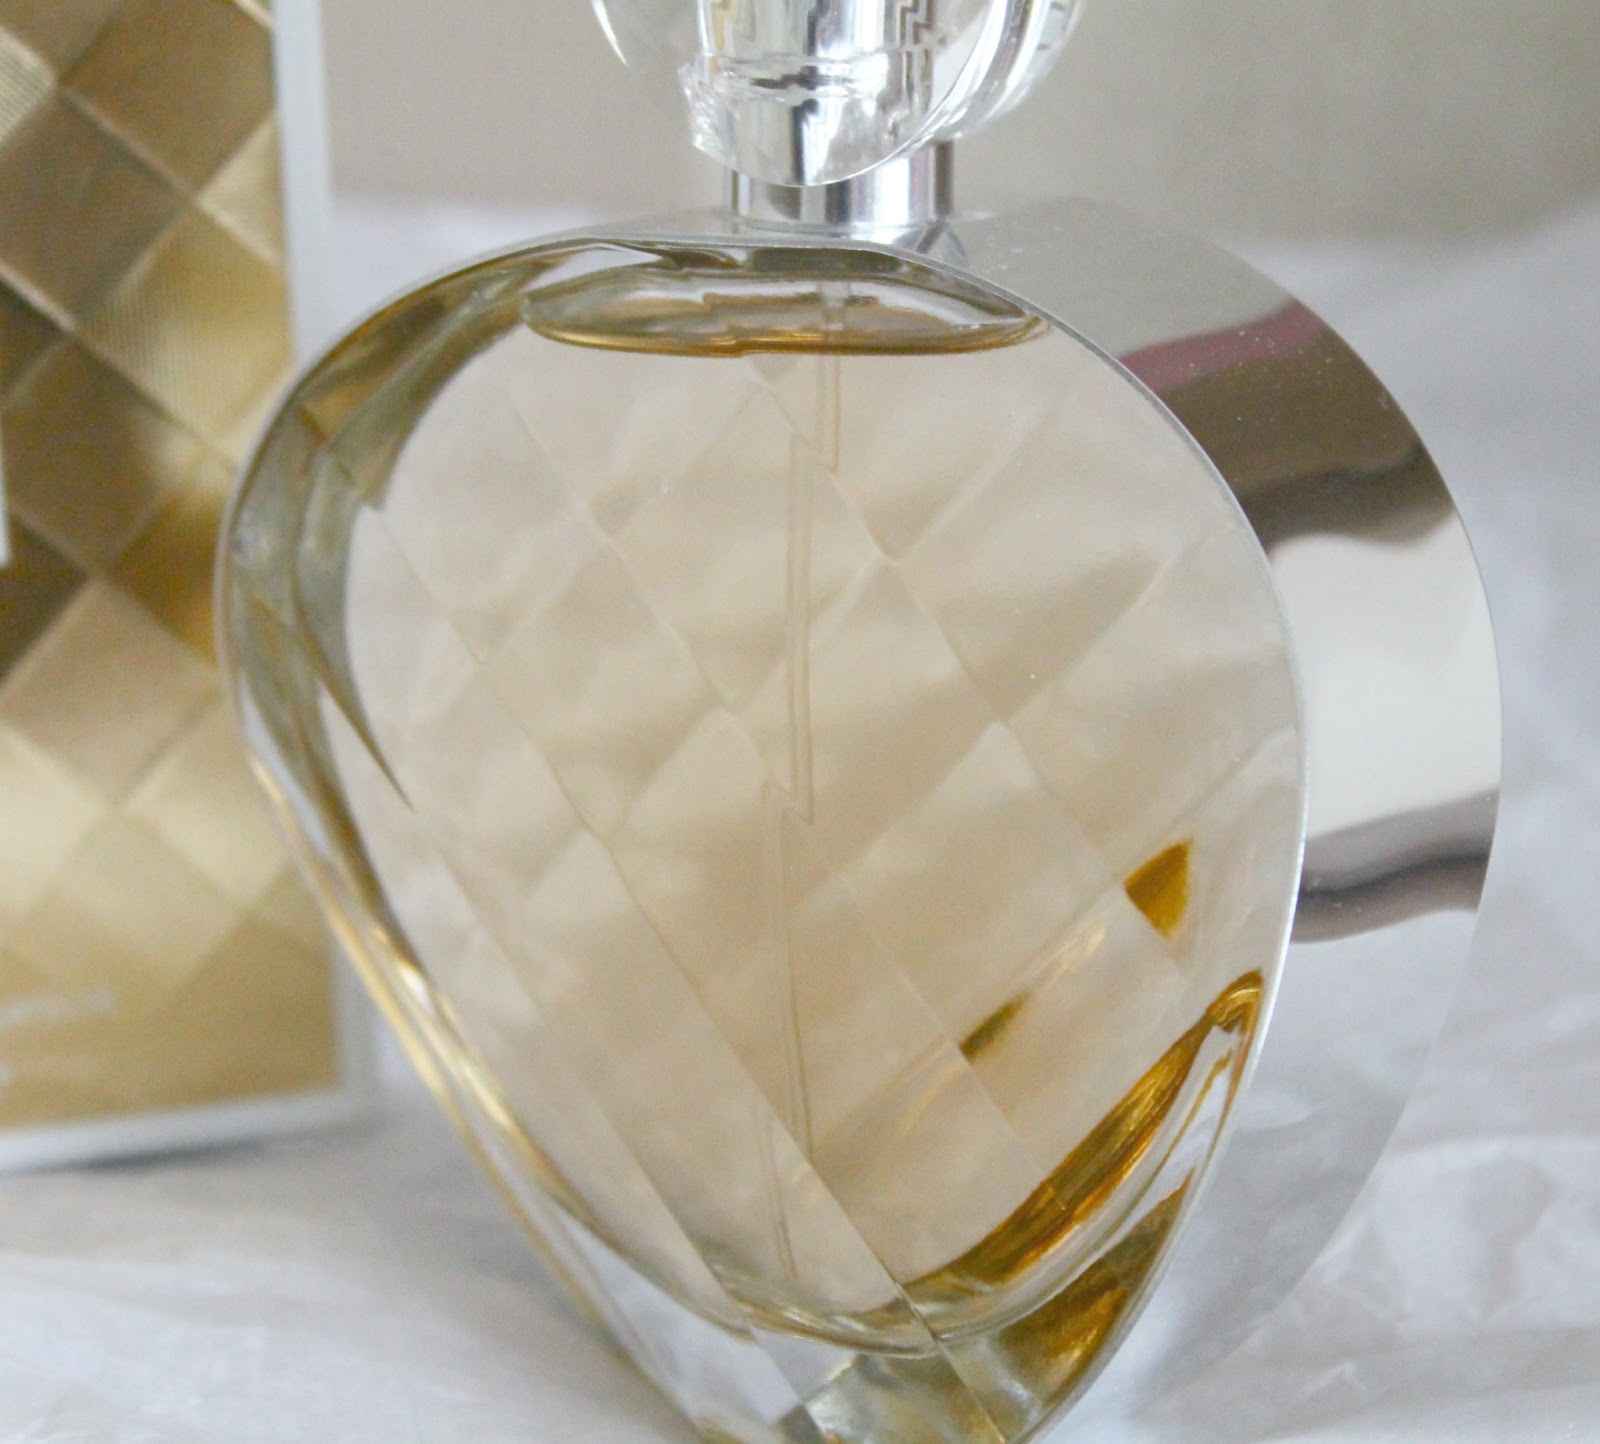
The beautiful glass bottle embodies the multi-faceted versatile nature of the modern woman. It looks really elegant and adds a hint of glamour to any dressing table.
I’m really surprised by how much I like this fragrance. Elizabeth Arden aren’t usually my go to brand for fragrance but Untold is a beautiful soft floral scent.

*Untold is available from August 4th at debenhams.com/beauty/elizabeth-arden and 1st September Nationwide, priced from £35*

FIVE OF THE BEST FREE BLOG TEMPLATES

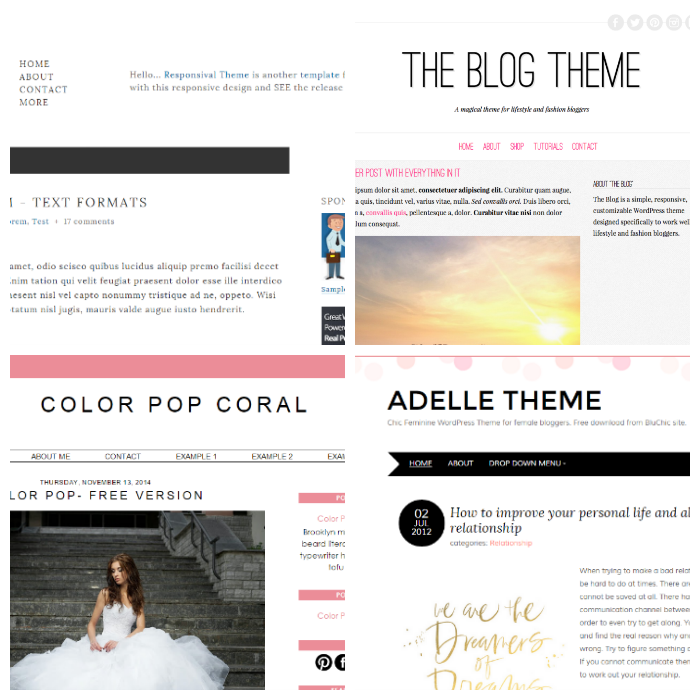
A great blog design can make a significant difference to your blog. Lets face it, we all want our blog to look good and if you dont want to spend a lot of money then here are a few options for you. There are a few free options on the web but these are five of my favourite templates.

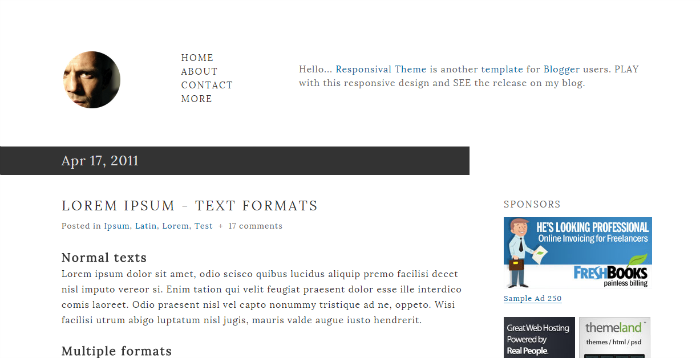
Responsival

A very chic and elegant template. The layout is a little different from normal, so if you download this make sure you read the instructions.
Demo |  Download
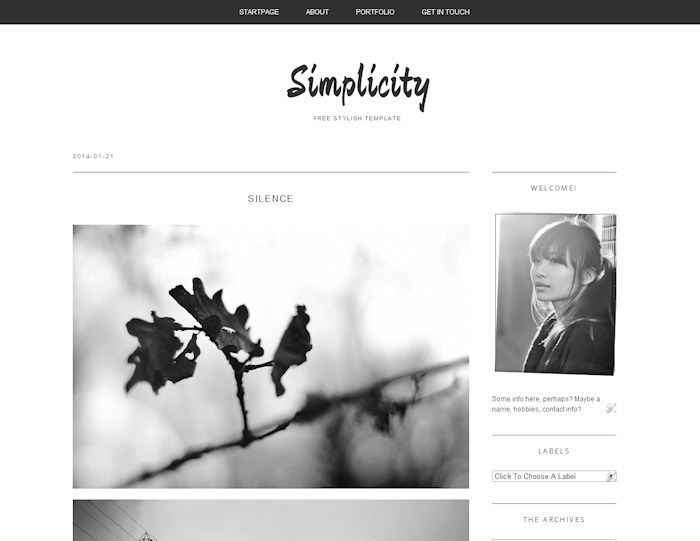
Simplicity

A beautiful modern template for blogger.
Demo | Downoad

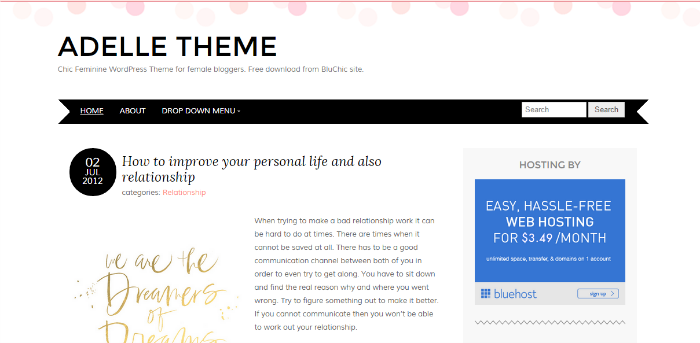
Adelle

A free pretty theme for wordpress

Demo | Download

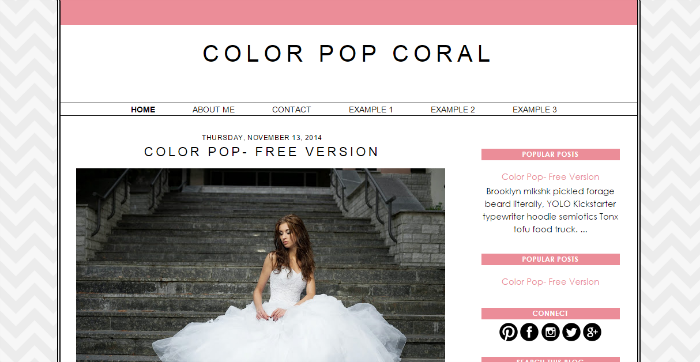
Color Pop

A colourful template for blogger. Super pretty, I’m surprised its free!

Demo | Download

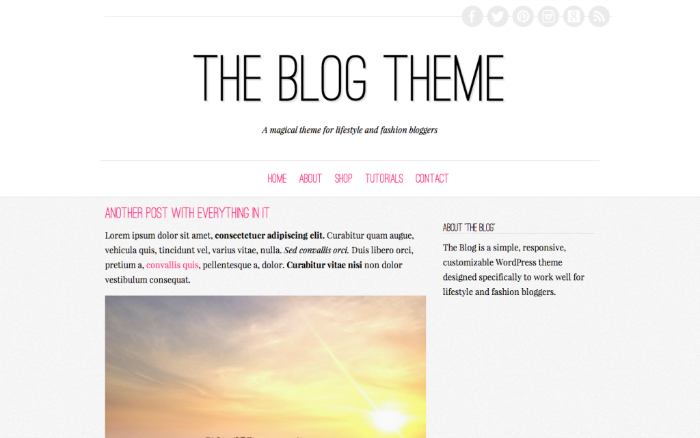
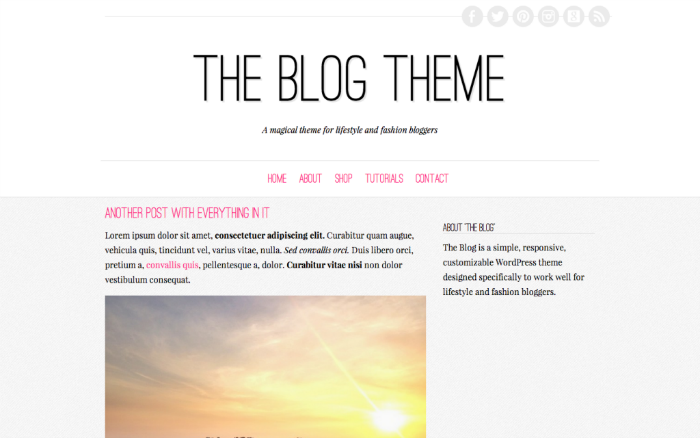
The Blog Theme

A cute wordpress design, ideal for all blogs.

Demo | Download

HTML TIPS: HOW TO LEAVE A CLICKABLE LINK IN BLOG COMMENTS

Leaving your blog link in a comment section is a great way to get your blog ‘out there’. As a blogger, I like to see who’s commenting and I’ve found some wonderful blogs not only in the comment section on here but also on other blogs too.

In the standard comment section of blogger/wordpress if you leave a link in the normal way it wont be a clickable link. So for example, if I were to comment on a blog post and leave this link underneath

you cant click on it to see my blog, you would have to copy and paste the link into the bar (or enter it manually) at the top of your browser for my blog to show.
In order to leave a clickable link all you need to do is add a little html coding, so mine would be<a href=””>Sweet Electric Blog</a>

or for your clicky link

<a href=”your blog link here”>your name or blog name here</a>
 
Just delete the blue text and add your blog/website link and delete the yellow and add your name/site name.

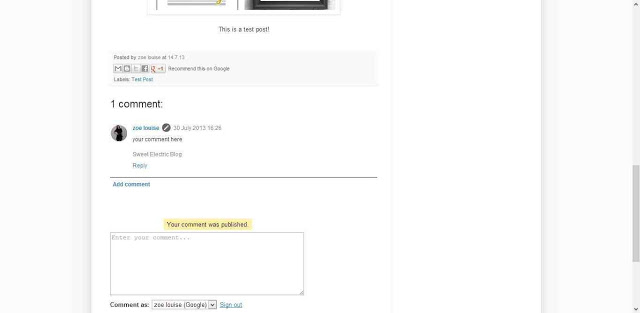
This is how my link now looks in comments

 
Your blog link is now clickable so now it will take people straight to your site!
 

I hope this was helpful!