Category: HTML TIPS

html tips & tricks for blogger

A super quick post today as my laptop has literally just broken so I’m having to use an ancient one until I can sort it out #problems. I’m gutted that I’ve lost all my files and picture though – always back up and save your work, it will save a lot of hassle and stress!
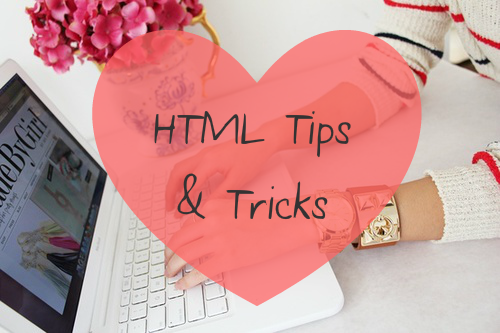
Anyway, on to today. I’ve written a few html tip posts in the past and for the benefit of new readers, I thought I’d do a little roundup. Some of them may need tweaking so bare with me. Though I’m not a pro designer I love html and creating pretty blog templates,so these are a few ways you can change up your blog too without too much hassle.

How to add social media icons to blog posts
How to resize blog photos to the same size
Sidebar borders
Removing blogger attribution
How to add a background to the sidebar
Styling the sidebar
How to add a signature in blog posts
How to leave a clickable link in blog comments
Using your own background in blogger
Using google fonts
Make your own blog button with grab box…

html tips: how to resize blog photos to the same size

Today I have a super quick tutorial on how to size all your blog post pictures to the same size without having to manually do it every time you post.

First, its a good idea to back up your blog template in case anything goes wrong. You can do this by going to the template section in your blogger dashboard and clicking on backup/restore which will give you the option to download your template.
To resize your photographs all you need to do is add a little coding and this can be easily done by clicking on the customise button in your template section – go to advanced – scroll down to add css and add the following code;

.post-body img {
width: 600px!important;
height: auto!important; }

The text in yellow is the blog post photo width and you can change this to your desired width if its too large for your blog. I currently use 600px images in my blog posts so you have an idea of how wide they are. As the height is set to auto, your images wont be distorted. This coding will make the images in all your blog posts the same size. I hope this was helpful and if you have any problems just let me know in the comments below.…

FREE BLOGGER TEMPLATE!

Today I’m offering a free blog template that I recently made. I’m not a professional web designer but I enjoy making them and thought it would be nice to share. You can see a live preview here.

You are more then welcome to make alterations if you know how – I have some tutorials here and will be uploading some more shortly. All I ask is that you don’t sell it on as your own work as that wouldn’t be cool.
You don’t need to use a header as the font is installed in the template but if you want to use your own all you need to do is upload it in the dashboard layout area of blogger – the widths of the template can be changed easily via blogger dashboard!

To get this template, just click download below – you’ll need to unzip the file. Then upload the template via blogger dashboard!

Let me know what you think – I have some others too which I may share depending upon the response…

A FREE BLOGGER TEMPLATE


When I first started blogging I struggled to find a nice free blog template for the blogger platform. When you’re blogging as a hobby, you don’t always want to spend £££s on a blog design so with that in mind I’ve decided to offer one completely free!I’ve shared free templates before but this is an updated version with hover effect social media icons. You can see it live here.

Download blog template here

To install your blog template simply go to the template section of your blogger dashboard – click on the backup/restore button on the top right hand side of the page – choose file – then click on the file from your computer – once you’ve chosen the file, click upload and your new template will now appear.

To install your social media icons – go to the layout section of your blogger dashboard – add html widget – input the following coding:

<!– FACEBOOK –/>

 photo 3_zpsba3cba55.png

<!– PINTEREST –/>
 photo 2_zpsd416e313.png

<!– INSTAGRAM –/>
 photo 5_zps34db02fd.png

<!– TWITTER –/>
 photo 5_zps34db02fd.png

<!– GOOGLE –/>
 photo 5_zps34db02fd.png

<!– YOUTUBE –/>

*Make sure you put the links to your social media accounts in the yellow boxes*

To resolve the default blurry google plus profile picture – go to layout – add html – add the following coding in the blank box:

*Make sure you place the html widget under your profile picture in the layout section of your blogger dashboard*

Let me know if you decide to use the template!You can of course change elements you dont like by altering your html template.

HOW TO ADD SOCIAL MEDIA ICONS TO BLOG POSTS!

Linking your social media accounts to your blog is not only a good way to boost your subscribers but in turn get your blog posts ‘out there’.
You may already know how to add social media buttons to your blog in which case this will be super easy but first I’ll show you how to add these in case you don’t already know. Firstly, you need to find or create your social media buttons – there are tonnes of free ones on the internet. Once you have some buttons, you need to add them to photobucket or a similar site. Then you need to go to the layout page on blogger – add html and add the following code:

In the yellow area is where you place the link to your social media account. In the blue area is where you put the direct link to your image on photobucket (or alternative to photobucket). In this coding, I’ve adding some padding in order to space out the social media buttons. In orange, you can increase or decrease this number depending on how much spacing you want between your buttons.

Once you have you social media buttons, you can add them to your blog posts. Adding your buttons to your blog posts, just makes it that bit easier for readers to find/follow your accounts. To add your buttons to your posts, all you need to do is copy the above coding (the coding you have for your social media buttons on your blog) and go to settings on your blogger dashboard. Then go to posts and comments section and paste the coding into the post template area. Click save. This ensures that when you go to write a new blog post, the coding and your buttons will automatically show up in your blog post!

If you prefer to use text links rather than buttons like I have in this post then you need to use the coding below;
Twitter | Bloglovin | Google +
In yellow just add the link to your chose social media account and in purple is the name of the account – you can change these to whichever one you want to use. Again, if you want to use this code, just paste it into the post template area in the posts and comments section in your settings on blogger dashboard. I hope this was helpful.

HTML TIPS: HOW TO LEAVE A CLICKABLE LINK IN BLOG COMMENTS

Leaving your blog link in a comment section is a great way to get your blog ‘out there’. As a blogger, I like to see who’s commenting and I’ve found some wonderful blogs not only in the comment section on here but also on other blogs too.

In the standard comment section of blogger/wordpress if you leave a link in the normal way it wont be a clickable link. So for example, if I were to comment on a blog post and leave this link underneath

you cant click on it to see my blog, you would have to copy and paste the link into the bar (or enter it manually) at the top of your browser for my blog to show.
In order to leave a clickable link all you need to do is add a little html coding, so mine would be<a href=””>Sweet Electric Blog</a>

or for your clicky link

<a href=”your blog link here”>your name or blog name here</a>
 
Just delete the blue text and add your blog/website link and delete the yellow and add your name/site name.

This is how my link now looks in comments

 
Your blog link is now clickable so now it will take people straight to your site!
 

I hope this was helpful!